

Preventive Maintenance of Radial Drilling Machines: A Practical Workshop Guide
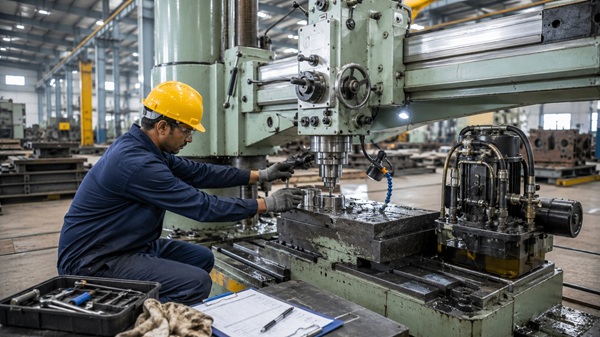
In a busy fabrication or heavy engineering workshop, your radial drilling machine is often the backbone of production. Whether drilling out a 500 kg casting or tapping structural steel frames, these machines endure heavy loads and long shifts.
However, when a major machine breaks down unexpectedly, production stalls, labor hours are wasted, and repair bills skyrocket.
Implementing a systematic preventive maintenance routine is the most effective way to protect your machinery investment, maintain hole precision, and ensure operator safety. This guide covers practical, field-tested maintenance steps designed to minimize shop floor downtime.
The Real Cost of Neglected Maintenance
Waiting for a machine to fail before fixing it (breakdown maintenance) is an expensive strategy. For industrial drills, neglect quickly shows up in production quality long before the motor burns out.
Skipping regular servicing directly leads to common workshop headaches:
- Loss of Precision: Minor wear in the spindle assemblies or a slight loosening of the column lock causes the drill head to deflect under load, resulting in oversized or misaligned holes.
- Excessive Vibration: Accumulated metal chips, worn spindle bearings, or unanchored foundation bolts introduce structural chatter. This chatter destroys expensive carbide tooling and compromises the surface finish.
- Premature Component Wear: Without a fresh film of oil, the heavy friction between the radial arm and the vertical column scores the guideways, leading to rough, jerky movements during setup.
Daily Inspection Checklist (Before Starting the Shift)
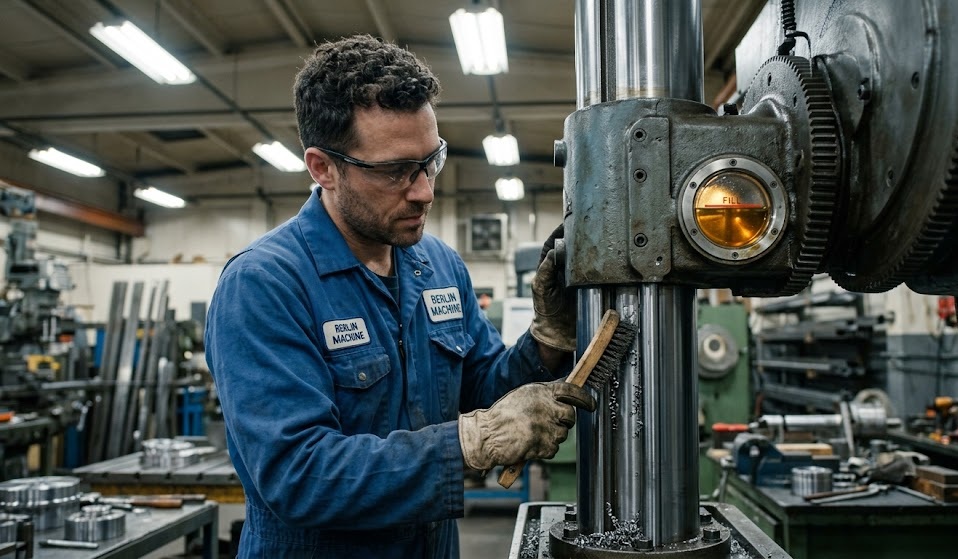
Five minutes of basic care at the start of every shift can prevent hours of emergency repairs later. Operators should complete this quick routine before powering up the spindle:
- Clear the Swarf and Debris: Use a brush or industrial vacuum to remove sharp metal chips from the base plate, column guideways, and coolant trays. Pro-tip: Avoid blasting compressed air directly at the spindle assembly or bearings, as this forces microscopic metal dust inside sensitive seals.
- Verify Fluid Levels: Check the sight glasses on the main gearbox, spindle head, and hydraulic clamping reservoirs. Running even slightly low on oil accelerates gear friction and generates extreme heat.
- Monitor the Coolant Flow: Inspect the coolant pump nozzle for blockages. Ensure the fluid isn’t contaminated with tramp oil or bacteria, which reduces heat dissipation and ruins tool cutting edges.
- Test the Controls and Safety Stops: Physically press the emergency stop buttons and test the limit switches on the arm travel. A safety mechanism that fails during an inspection is a major hazard during a live operation.
Weekly Deep-Cleaning and Adjustments
Weekly checks focus on the driving mechanisms that keep the spindle running smoothly under high torque:
- Examine Transmission Belts: Inspect all drive belts for signs of cracking, fraying, or slippage. Ensure the tension matches manufacturer specifications; over-tightened belts stress the motor bearings, while loose belts cause the spindle to stall under heavy boring loads.
- Inspect the Radial Arm Movement: Elevate and lower the horizontal arm across its full vertical travel length. If you notice any sticking or uneven resistance, clean the vertical column thoroughly and apply a light coat of industrial-grade way lubricant.
- Assess Tool Holders and Arbors: Clean the internal taper of the spindle. Wipe down drill chucks and Morse taper shanks (like MT4 or MT5). Dirt or burrs inside the taper prevent the tool from seating straight, causing the drill bit to run off-center.
Here is the monthly maintenance information organized into a clear, scannable table for your document:
Monthly Servicing and Calibration Focus
|
Maintenance Category |
Key Inspection & Actions |
Primary Goal |
|
Hydraulic Systems |
Check for pressure drops, weeping hoses, and valve leaks. |
Maintains solid clamping stability during heavy boring operations. |
|
Gearbox Care |
Filter or flush old oil; inspect for gear tooth wear. |
Prevents internal gear friction, overheating, and premature component failure. |
|
Alignment Checks |
Calibrate arm-to-column squareness. |
Protects drilling accuracy, prevents binding, and reduces tool wear. |
- Test the Hydraulic Clamping System: On heavy-duty machines, hydraulic locks hold the column, arm, and drill head rigid during deep boring. Check for slow clamping action, weeping hoses, or pressure drops that allow the head to drift during a heavy cut.
- Check for Bearing Play: Manually check the spindle for excessive lateral or axial play. If you notice a grinding noise or structural heat buildup near the spindle nose, the bearings likely require adjustment or replacement.
- Verify Machine Alignment: Use a dial indicator to check the squareness of the spindle relative to the base plate. Even a fraction of a degree of misalignment causes binding, rapid tool wear, and inaccurate hole depths.
Lubrication Best Practices
Proper lubrication is the single most important factor in extending the lifespan of a gear-driven radial drill.
- Avoid Over-Lubrication: Applying too much grease or oil can be just as damaging as applying too little. Excess grease acts as a magnet for fine metal dust, turning into an abrasive grinding paste that destroys seals and guideways.
- Watch for Warning Signs: If a machine compartment sounds unusually loud, feels hot to the touch, or vibrates more than normal, pull the oil plug. Milky oil indicates water or coolant contamination, while dark, gritty oil indicates internal component wear. Always flush the system and refill it with clean, industrial-grade lubricant recommended by your machine supplier.
Actionable Takeaways for Shop Managers
- Keep a Maintenance Log: Hang a simple laminating checklist next to the machine. Tracking when oil was changed, or when belts were replaced, simplifies long-term planning and ensures accountability.
- Train Your Staff: Ensure operators understand the structural limits of the machine. Using a light-duty radial drill to force massive, oversized holes overloads the motor and warps the arm alignment.
- Partner with a Reliable Supplier: Long-term machine reliability depends heavily on the quality of your equipment and your access to spare parts.
If you are expanding your workshop or outfitting a new fabrication line, choosing a dependable partner makes all the difference. Explore Heavy-Duty Radial Drilling Machines from Berlin Machineries to view reliable, gear-driven models built with rigid hydraulic clamping systems. They offer complete technical documentation, on-site installation assistance, and readily available spare parts to keep your shop floor running without interruption.
Frequently Asked Questions
How often should I completely change the gearbox oil?
For a standard machine running single shifts, a complete gearbox oil flush and replacement is typically recommended every 6 to 12 months, or after every 1,500 operating hours. Always check your specific supplier manual for exact intervals.
What causes a radial drill head to vibrate excessively during a cut?
Vibration is usually caused by a failure to engage the hydraulic or mechanical clamping levers before drilling. If the clamps are locked and vibration continues, inspect the machine for worn spindle bearings, loose foundation bolts, or an dull drill bit that is forcing its way through the material.
Why is my radial arm difficult to swing or elevate?
This is almost always caused by a buildup of dried coolant residue, dust, and metal chips on the vertical column guideways. Clean the column face completely with a mild solvent, dry it, and apply fresh way oil to restore smooth, 360-degree movement.
