

Wire EDM Problems and How to Fix Them: Practical Guide
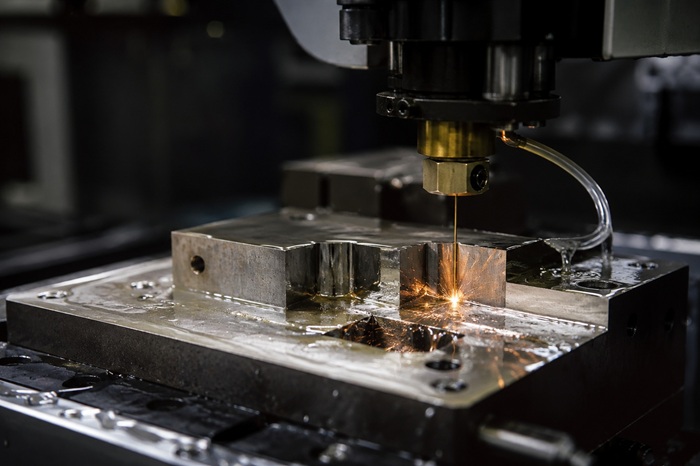
When a wire EDM machine stops performing the way it should, production doesn’t just slow down — it stops. A broken wire mid-cut, a surface that won’t meet Ra tolerance, or a part that keeps coming out 0.05 mm off can derail an entire tool room schedule.
This guide addresses the seven most common wire EDM faults that operators and tool room supervisors encounter in real shop-floor conditions. For each problem, you’ll find the likely cause and a clear, actionable fix — written from hands-on EDM manufacturing experience, not from theory.
Why Wire EDM Machines Develop Faults
Before jumping into specific problems, it helps to understand what’s actually happening inside the machine.
Wire EDM (also called wire erosion or wire cut EDM) removes material by generating controlled electrical sparks between a thin wire electrode and the conductive workpiece. There’s no physical cutting contact — the wire never touches the part. This makes it exceptionally precise, but it also means that small changes in electrical conditions, wire condition, fluid quality, or mechanical alignment can have a disproportionate effect on output quality.
Most faults fall into one of three categories:
- Mechanical — wire guides, rollers, bearings, clamping
- Electrical — power supply, spark gap settings, pulse parameters
- Process — dielectric fluid condition, flushing pressure, CNC program settings
Understanding which category a fault belongs to points you directly to where to look — and what to adjust.
The 7 Most Common Wire EDM Problems (and Their Solutions)
1. The Wire Keeps Breaking During Cutting
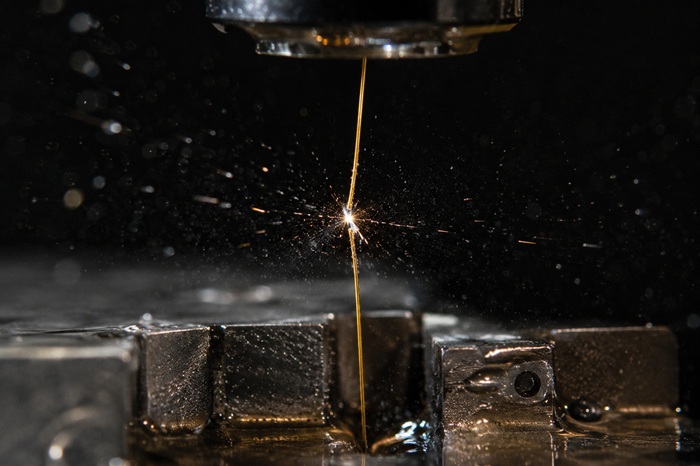
What you’ll notice: The wire snaps repeatedly, sometimes within minutes of starting a new cut. You’re spending more time rethreading than cutting.
Why it happens:
Wire breakage is almost always a combination of factors rather than a single cause. The most common culprits are:
- Wire tension set too high for the wire diameter or material being cut
- Worn ceramic wire guides creating uneven wire movement
- Contaminated or low-conductivity dielectric fluid that can’t flush eroded particles away fast enough
- Pulse energy (peak current and on-time) set too aggressively for the workpiece thickness
What to do:
Start with the guides. Ceramic wire guides wear gradually, and worn guides cause the wire to run slightly off-centre, concentrating stress at one point. Inspect them under magnification — replace if there’s any visible groove or flat spot.
Next, check your dielectric fluid conductivity. If it’s outside the correct range for your machine, the spark environment becomes unstable, which increases the likelihood of a localised arc that burns through the wire. Replenish or replace the fluid and verify the reading before continuing.
If the problem persists, reduce your pulse on-time in the CNC controller settings. This lowers the energy per spark — less efficient, but far more stable, especially on thicker materials or harder grades like Cr12 and H13.
Finally, verify that your wire type and diameter are correctly matched to the job. Berlin machines support wire diameters from Ø 0.12 mm to Ø 0.25 mm. Using a finer wire on a thick, hard workpiece without adjusting parameters is a common cause of breakage in busy tool rooms.
Preventive habit: Set a monthly inspection schedule for wire guides. They’re inexpensive to replace and expensive to ignore.
2. Poor Surface Finish — The Part Looks Rough or Striated
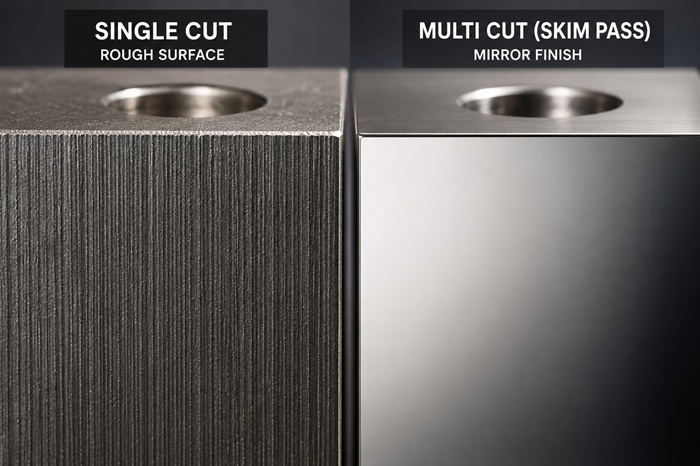
What you’ll notice: The cut surface has visible lines, a grainy texture, or the Ra value measured after the job is higher than specified. Mold and die work that should have come off the machine ready for minor polishing needs significant rework instead.
Why it happens:
The single most common reason for poor surface finish on a wire cut machine is running a single cutting pass when the part requires a multi-cut strategy.
A single rough cut removes material quickly but leaves a heat-affected layer and minor surface irregularities. Multi-cut (also called skim cutting) uses a rough pass followed by one or two skim passes at progressively lower energy settings. Each skim pass removes the recast layer from the previous cut and leaves a cleaner surface.
Other contributing factors include:
- Pulse width and peak current not calibrated to the material
- Insufficient or misaligned flushing — eroded particles re-depositing on the surface
- Degraded dielectric fluid that’s lost its insulating and flushing properties
What to do:
If you need a finish below Ra 2.5 (single cut) or Ra 1.5 (multi-cut), check your cutting strategy first. Programme one rough pass followed by at least one skim pass. The Premium Servo Series achieves Ra < 1.5 on multi-cut under normal operating conditions — if you’re not reaching that, the cutting programme is the first place to look, not the machine.
Then verify flushing nozzle alignment. The nozzles should be positioned symmetrically around the wire entry and exit points, with consistent pressure. Uneven flushing is a common cause of striated surfaces that baffles operators because the machine “looks fine.”
If the finish is still inconsistent after correcting the programme and flushing, check dielectric conductivity and replace filter cartridges if overdue.
3. Dimensional Inaccuracy — The Machine Is Not Cutting to Spec
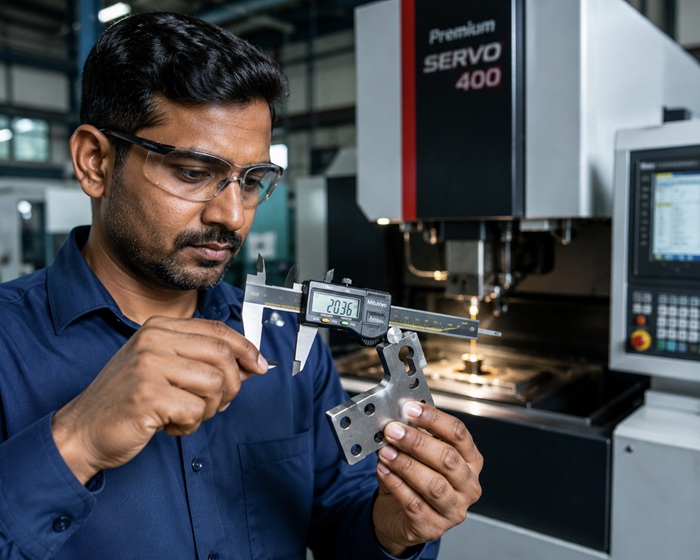
What you’ll notice: Parts are consistently outside tolerance — perhaps 0.03 mm to 0.08 mm off in one axis. Or straight cuts have a slight taper when they should be perpendicular. Or dimensions vary between the start and end of a long cut.
Why it happens:
Dimensional errors in wire EDM trace back to four main sources:
- Wire deflection — when feed rate is too high relative to the material and thickness, the wire bends slightly under spark pressure, causing it to lag behind the programmed path
- Incorrect wire offset (kerf compensation) — the CNC programme must account for the width of material removed by the wire. If this value is wrong or outdated, every dimension will be systematically off
- Axis calibration drift — servo systems maintain positional accuracy, but bearings and guide-frame components wear over time. An uncalibrated axis introduces a consistent positional error
- Thermal expansion — on long jobs or in poorly ventilated workshops, the workpiece or machine frame can expand enough to affect dimensions
What to do:
Begin with the wire offset value in your CNC controller. This value is specific to your wire diameter, material type, and cutting conditions. If you’ve changed wire brands or moved to a different material grade recently without updating this value, you’ll see systematic dimensional errors on every job.
Run an axis calibration check through the CNC Multicut Controller. Berlin machines use high-performance servo motors that maintain positional accuracy over time, but calibration is still a scheduled maintenance task — not a one-time setup.
If taper is appearing in cuts that should be square, check the guide alignment. The upper and lower wire guides must be perfectly vertical. Use the wire alignment tool supplied as a standard accessory to verify this before ruling it out.
For long cuts, reduce feed rate slightly. Wire deflection is proportional to feed rate — slowing down by 10–15% on deep or long cuts often eliminates the dimensional drift that appears toward the end of a run.
4. Cutting Speed Is Much Lower Than Expected
What you’ll notice: Jobs that used to take two hours now take four. The machine is running, sparking, and feeding — but at a fraction of the speed it should be capable of. Production schedules slip.
Why it happens:
The Premium Servo Series is rated for a standard cutting speed of 120–140 mm²/min, with a maximum of 160–180 mm²/min on suitable materials. If you’re running significantly below the lower end of that range, something is actively limiting the machine’s output.
Common causes:
- Pulse energy parameters set too conservatively — operators sometimes reduce settings to fix a surface finish or wire break problem and forget to reset them
- Saturated dielectric filters reducing flushing efficiency — inadequate flushing slows the machine because the controller detects unstable spark conditions and reduces the feed rate automatically
- Incorrect servo feed sensitivity for the material being cut
- Wire speed running below specification — the wire should be travelling at 11 m/s; slower wire speed limits how aggressively the machine can cut without wire damage
What to do:
Check the cutting conditions settings in the controller first. Compare them against the recommended parameters for your material type and thickness from the cutting conditions table. It’s common to find that conservative settings applied for a previous job haven’t been updated.
Then inspect your dielectric filters. Replace the filtration cartridges if they’re overdue — the machine’s controller often compensates for poor flushing by slowing down, which makes it look like a performance problem when it’s actually a maintenance issue.
Verify wire speed. On the Premium Servo Series, wire speed should be running at or near 11 m/s for standard cutting. Running slower to “save wire” costs more in productivity than it saves in consumables.
5. Dielectric Fluid Problems — Contamination, Overflow, or Wrong Conductivity
What you’ll notice: The fluid in the tank looks milky, discoloured, or has visible particles. Sparking becomes erratic. Wire breaks and surface finish problems start appearing together. The conductivity reading on the machine’s display is outside the normal operating range.
Why it happens:
The dielectric fluid (deionised water in most wire EDM machines) serves three critical functions: it insulates the gap between the wire and workpiece, it carries away eroded material, and it cools the cut zone. When the fluid is compromised, all three functions degrade simultaneously.
Specific causes include:
- Saturated filter media that can no longer remove eroded metal particles
- Bacterial growth in the tank, particularly when the machine sits idle for extended periods
- Using tap water instead of deionised water, or deionised water without maintaining the correct resistivity
- The machine running without adequate fluid top-up, allowing concentration of contaminants
What to do:
Replace filter cartridges on the schedule recommended in your Operation Manual. Do not wait until the fluid is visibly degraded — by that point, you’ve likely already run substandard cuts.
If the fluid appears milky or smells unusual, drain and clean the tank fully, then refill with fresh deionised water. Add an anti-bacterial additive at the recommended concentration if the machine operates in a warm environment or sits unused for more than a few days at a time.
Measure and log dielectric conductivity daily. The correct operating range for wire cut EDM is typically between 10 and 50 µS/cm — your machine documentation specifies the exact range for your model. Readings above this range indicate contamination or mineral build-up; readings below indicate that the water has become too pure (which actually causes its own sparking inconsistencies).
For workshops with high production volumes, the optional Magnetic Filter upgrade significantly extends the life of standard filter cartridges by capturing metallic particles before they reach the main filter. The Double Filter Tank option provides continuous operation without production stops during filter changes.
Preventive habit: Log conductivity daily. Do a full tank flush every 90 days regardless of visual condition.
6. The Workpiece Shifts During Cutting
What you’ll notice: A visible step or line appears on the cut surface partway through the job. Dimensions measured from one side of a part don’t match dimensions from the other side. Parts that start in spec drift out of tolerance as the cut progresses.
Why it happens:
Wire EDM applies no cutting force — but it does transmit vibration through the dielectric fluid and the machine structure. On poorly clamped workpieces, this is enough to cause gradual movement over a long cut.
Specific causes include:
- Insufficient clamping force, particularly on tall or narrow workpieces
- The workpiece weight exceeding the rated table capacity for the machine model
- Using improvised clamping instead of the proper clamping tool supplied with the machine
- Thin, flat workpieces that flex under fluid pressure from the flushing nozzles
What to do:
Always use the clamping tool supplied as a standard accessory. It’s designed for the table surface and workpiece formats that the machine is intended to handle. Improvised clamping with whatever’s available in the tool room is a surprisingly common cause of this problem.
Check your workpiece weight against the table rating for your model. The PS-7745 is rated for workpieces up to 400 kg, the PS-7745S up to 600 kg, and the PS-7755S up to 800 kg. Overloading the table doesn’t just cause clamping problems — it affects axis movement accuracy too.
For thin, flat workpieces, use bridge clamps or magnetic clamping to distribute the holding force across a wider area. A tall, thin workpiece clamped only at its base acts like a lever under flushing pressure — the top of the part deflects even when the base is secure.
7. CNC Controller Errors and Unexpected Program Faults
What you’ll notice: Alarm codes appear mid-run. The machine stops unexpectedly. The cut path doesn’t match what was programmed, or the machine cuts at incorrect coordinates. The axis moves to an unexpected position at the start of a job.
Why it happens:
Most controller errors on wire EDM machines trace back to the programme rather than the machine itself. The most frequent sources:
- Incorrect DXF file import — geometry that looks correct in CAD can contain open profiles, duplicate lines, or incorrect units that cause the controller to interpret the path incorrectly
- Wrong wire offset (kerf compensation) value entered for the job
- Material code in the cutting conditions library not matching the actual material being cut
- Programme referencing a start hole that doesn’t correspond to the actual workpiece position
What to do:
Before every job, run a dry simulation (no wire, no power) if your controller supports it. The CNC Multicut Controller includes an AutoCAD-integrated toolpath preview — use it to visually confirm the path before committing to a cut.
When importing DXF files, check for open profiles. A closed profile in CAD can have micro-gaps at join points that aren’t visible at normal zoom levels but cause the controller to reject or misinterpret the path. Explode and rejoin geometry in your CAD software before exporting if you’re seeing import errors.
Cross-reference your cutting conditions settings (material, thickness, finish requirement) against the conditions table in the Operation Manual before each new material or job type. The controller’s conditions library covers standard materials — if you’re working with an unusual alloy, those settings need to be set manually and verified with a test cut.
If you’re encountering alarm codes that aren’t self-explanatory, Berlin Machineries provides technical support for all installed machines. Do not attempt to bypass alarms by clearing them without identifying the cause — they exist to prevent damage to the machine and workpiece.
Quick-Reference Troubleshooting Table
| Symptom | Most Likely Cause | First Action |
| Wire breaks repeatedly | Worn guides or wrong tension | Inspect ceramic guides; recalibrate wire tension |
| Rough surface finish | Single-pass cutting or poor flushing | Switch to multi-cut strategy; check nozzle alignment |
| Dimensions out of spec | Wrong kerf compensation or wire deflection | Verify wire offset value in controller |
| Cutting speed too low | Conservative pulse settings or dirty filters | Check cutting conditions table; replace filter cartridges |
| Erratic sparking, milky fluid | Contaminated dielectric | Replace filters; drain, clean and refill tank |
| Workpiece shift mid-cut | Insufficient clamping | Use correct clamping tool; verify weight vs table rating |
| Alarm codes / unexpected stops | Programme error or settings mismatch | Run dry simulation; cross-check cutting conditions |
Note: If a fault persists after working through these steps, a service technician visit is the fastest path to resolution. Further self-diagnosis on an active machine fault risks producing more scrap and potentially damaging the machine.
A Word on Preventive Maintenance
Most of the problems covered above share a common theme: they’re easier to prevent than to fix mid-production.
A simple maintenance schedule for wire EDM machines in continuous use:
- Daily: Log dielectric conductivity; inspect wire spool; check flushing nozzle alignment
- Weekly: Wipe down guide areas; check wire tension mechanism; inspect rollers
- Monthly: Inspect ceramic wire guides; lubricate per Operation Manual; check axis calibration
- Every 90 days: Full dielectric tank drain and refill; replace filter cartridges; check servo motor settings
Berlin’s machines include an automatic lubrication system as standard, which handles one of the most neglected maintenance tasks. But the fluid management and guide inspection still require human attention.
About Berlin Machineries
Berlin Machineries has been manufacturing CNC EDM machines in Pune, Maharashtra since 2005. With over 5,000 machines installed across tool rooms, mold manufacturers, automotive suppliers, and precision engineering units throughout India, the technical support team has seen — and resolved — most of the faults described in this guide many times over.
If you’re working through a fault that isn’t resolving, the fastest option is a direct conversation with someone who knows the machine.
Facing a wire EDM problem you can’t resolve?
Describe what’s happening and Berlin Machineries’ technical team will respond within 24 hours — no charge, no obligation.
Talk to a Berlin EDM engineer →
Or call us directly to speak with a technician who can walk through the fault with you in real time.
